
New year, new flat, and new home infrastructure. With so many machines connected to the network, I want to try again a home DNS server so that I don't need to remember all the IPs in my LAN. That is my goal, and if it serves as a base for further browsing experience improvement, then welcome.
In this article I intend to setup a DNSMasq minimally for my network.
Context
I've been collecting few Raspberry Pi that have some spare use, mostly try ups of systems before I go serious in DigitalOcean, or I surrender and buy a Synology to do confident NAS. Anyhow, I have a network of around 15 devices and a DNS starts to be necessary as I really don't want to remember all their IPs.
Last iteration was a PiHole over a Raspberry Pi 3B+. It was a great project that ran ok-ish in that machine but suffered from my annoying Vodafone router, which wouldn't let me set up stuff and therefor I couldn't make my own DNS server to be delivered with the DHCP config to the machines, plus some issues due to the tricky setup. Unstable internet connection and miserable overall experience, I won't go that route again. But while fighting with the PiHole I got to know DNSMasq and had the whole time the idea that with it should suffice.
This time I want it simple: the lowest Raspberry Pi I have around and DNSMasq, and let's see.
Goal
Let's leave this clear: I just want one step further than a /etc/hosts file in every machine. I want that the DHCP server in my router delivers my local name server address, which will resolve the names for the machines in my local network and the rest just upstream as usual. And has to be children level easy to maintain and set up.
I am explicitly not going for a sink hole, or a DNS cache, or any other of the benefits that DNSs have and that I will explore later on.
Requirements
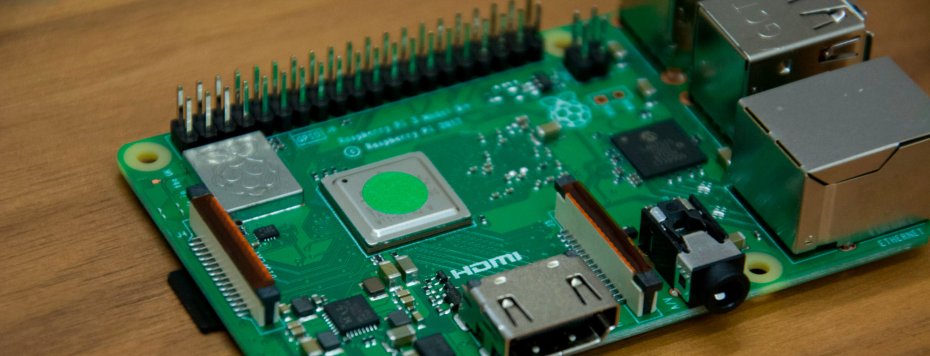
I have all other Raspberries scheduled with future plans, so I can only use this Raspberry 2B+. As you can see in the specs, it is only 100 Mb Ethernet, and I have my concern if it will endure correctly in a local network environment, but I guess that the load for name resolving should not be that huge. That will be something I will study.
- Raspberry Pi 2B+
- Raspberry Pi OS (aka the new Raspbian. 32bit lite, without desktop)
- Micro-SD card (minimally fast and modern, my old 8GB Class 1 wouldn't boot smooth, my not-so-old 16GB Class 10 does)
Spawn a working Raspberry Pi
Well, in internet are plenty of tutorials and set-by-step how-tos on how to get a working RPi. I won't go deep here, but just for the record:
-
In your own computer, download the Raspberry Pi Imager
-
Insert your Micro-SD card
-
Choose the Raspberry Pi OS Lite (32-bit) and the location of your Micro-SD card.
-
I would recommend to press the Settings button (the round gear) and adjust some of the settings there, as I intend to do it headless. Follow this nice tutorial, and don't forget to set up the SSH access!
-
Write the Micro-SD card
-
Plug it into the Raspberry
-
Connect the power and wait some minutes
-
Go to your router's network section to see the Raspberry getting connected and with what IP. If you don't have that, you can always run the following shell command (Mac and Linux). Just replace the
$INTERFACEwith the name of the interface you use to connect to the network (likeeth0oren0):$ sudo arp-scan --interface="$INTERFACE" --localnet -
SSH to your machine and finish the installation by firing the
raspi-configand by setting a static IP, usingdhcpcdin my case (this is important, you want a static address for your DNS server, right?) -
Reboot, and there you go.
Set up the DNS server
So we have the RPi up and running, we SSH into it and we're ready to go. From the several options that we have, I chose DNSMasq as I discovered it in the past and I can only see benefits:
- Simple and lightweight system service, and it comes within the system's package repository
- The set up is a single config file, well documented
- There are plenty of online resources
Install DNSMasq
-
Update the system. In my case took a while:
$ sudo apt update $ sudo apt upgrade -
Install the DNSMasq package
$ sudo apt install dnsmasq
Done, DNSMasq is in our system
Configure DNSMasq
The configuration of the server is done by editing the file in /etc/dnsmasq.conf
-
Make a backup of the config file
$ cp /etc/dnsmasq.conf ~/dnsmasq.conf.backup -
Edit the configuration file
$ sudo nano /etc/dnsmasq.conf -
Uncomment the
domain-neededandbogus-privparameter. They prevent packets with malformed domain names and packets with private IP addresses from leaving the network. -
Uncomment the
expand-hostsanddomain=parameter, and set a value for it, for example:domain=local. This way all local machines defined in the/etc/hostswill acquire a domain suffix, in the example the hostalderaanbecomesalderaan.local, which has some further advantages. -
Uncomment the
resolv-file=parameter and place the following valueresolv-file=/etc/resolv.dnsmasq.conf. This is telling where to find a file where we have set up the upstream nameservers. We go there in a second. -
Save with
ctrl + oand exit withctrl + x
Set up the upstream servers
Now we create the file with the upstream servers:
-
Open nano with a new file, that is the name we used in the previous point 5.
$ sudo nano /etc/resolv.dnsmasq.conf -
We add one line like the following per name server (where
[ip]is the name server IP we want to set up):nameserver [ip]In my case, I added the following:
nameserver 1.1.1.1
nameserver 1.0.0.1
nameserver 9.9.9.9
nameserver 149.112.112.112
The 2 first ones are the primary and secondary DNSs from Cloudflare, and the 2 last ones are the primary and secondary DNSs from Quad9. You can choose yours from this article (nice explanation, BTW).
-
Save with
ctrl + oand exit withctrl + x
Set up the names for the local machines IPs
And now comes the goal achievement: to set up the dictionary that tailors the names and the IPs of the local machines. This is no more than just setting up the /etc/hosts file in the DNS server machine, and it will be picked up and used. So simple.
-
Make a backup of the file
$ cp /etc/hosts ~/hosts.backup -
Edit the file
$ sudo nano /etc/hosts -
Add all the name / IP pairs that define the machines in the network. Here's my whole file at this point:
127.0.0.1 localhost ::1 localhost ip6-localhost ip6-loopback ff02::1 ip6-allnodes ff02::2 ip6-allrouters 192.168.0.1 router 192.168.0.231 dagobah 192.168.0.232 alderaan 192.168.0.233 tatooine 192.168.0.234 coruscant 192.168.0.240 magatzem 192.168.0.241 backups 192.168.0.251 brother -
Save with
ctrl + oand exit withctrl + x
Restart the server
Now the only thing left is to restart the DNSMasq server for the changes to take effect:
$ sudo service dnsmasq restartWe can also check the status of the server by running:
$ sudo service dnsmasq statusApply the change to the whole network
Here we have 2 main options:
- We go machine by machine and update the DNS server IP.
- We go to the router and set in the DHCP server that the DNS server is not the router, that now is the DNSMasq machine
For the local machines that are set up with static IPs, the only option is to do the first point. As I have all the RPi machines set up with dhcpcd I have to go one by one and change the /etc/dhcpcd.conf where I have defined the static domain_name_servers parameter to point to 192.168.0.231 (My DNS server's IP)
For the local machines that read from DHCP, which are the majority (laptops, phones, tablets, ...) I only need to go to the router and tell that he has to distribute another IP for the DNS server.
Setting up a custom DNS server in the DHCP service in Fritz!box 7590 AX
- Enter into the router's web console
- Go to Home Network > Network > Network Settings tab
- Scroll down and click on IPv4 Settings
- In Home Network, under the Enable DHCP server, there is a Local DNS server entry to place an IP address.
- Type there the IP of the DNS server
- Click on OK. Most likely it will ask you to perform any type of double security action.
Refresh the clients!
At this point, all the infrastructure is prepared. The new clients in the network will request to the DCHP the network config and will receive the new DNS local server. Just remember the DHCP clients that are currently connected to the network, they need to refresh the network parameters.
Wrapping up
While the previous PiHole approach kept me working for several days, this approach was done during a closing day moment in the bed with the laptop in my lap and working straight away. All actions get summarized here:
- Have a Raspberry Pi up and running
- Install a single package from the official repositories
- Quick setup of a couple of config files, and restart the server
- Update the setup of the DCHP so that it distributes our new DNS server IP
- Refresh the connection of the clients
Really really simple 😊
Further reading and testing
After executing all these actions, I realized that maybe I was a bit over complicating the nameserver set up for the upstream: wanting to keep it simple, we can even have it set up in the dnsmasq.conf. It would reduce the files to only one, but still make sense to me to have it externalized (but then we could also externalize other parameters too)
I remember tunning up a bit the DNS server in the PiHole and there are other parameters I'd love to try. Also there are plenty of articles (like this one) suggesting approaches here and there, that are interesting to consider. Will happen soon 😊