Publish Python packages to PyPI with Poetry
26/01/2024 20:00 digital life deployment
programming
Python
deployment
programming
Python
While working in my pyxavi #Python library I was wondering how complicated would it be to publish it as the rest of the packages I use often. How difficult is to build and distribute a project through #PyPI? In this article I go through the steps of building and publishing a Python package into PyPI with #Poetry for everyone to use it.
Overview
- Assumptions
- Context
- Preparing the environment
- Build the project
- Publish the package
- Use the published package
- Formatting the project's PyPI page
- Wrapping up
1. Assumptions
- You have a running project in Python and managing it under Poetry. For this article I'll use my library pyxavi. In case you need some help on getting started you can take a look at my previous article Les èines del programador - part 1 (in catalan, but you can read it translated to english here)
- Of course, you have Python 3 and Poetry installed in your system. Otherwise, visit the official page for Python and for Poetry.
2. Context
When we abstract some functionality from our Python code into a library, we often think about maintaining it externally from the project, so we can re-use it for other projects.
Until now I was using tags in git to achieve this:
- Create a tag from the current state of the library code in its
mainbranchgit tag -a v0.1.2 -m "v0.1.2" - Push the tag to the repository
git push origin v0.1.2 - From the application, refer to the tag when defining the dependency. In the
pyproject.toml:... [tool.poetry.dependencies] python = "^3.9" ... pyxavi = { git = "https://github.com/XaviArnaus/pyxavi", tag = "v0.1.2" }
I have an article where I quickly go through Git tags: Git Tag: My quick reference to git tagging.
This is very useful for development but what I would like to achieve is to call my own dependency as any other package in Python. And this is what this article is about: let's bring the pyxavi library to PyPI.
The first time I set this up I followed the DigitalOcean's guide to publish to PyPI through Poetry in Ubuntu, so this article is very inspired by it.
3. Preparing the environment
PyPi is the official repository for Python packages. It is the official third party source for Python packages, and is operated by the Python Software Foundation. When we upload our package there we're making it available to everybody to download it and use it in their own applications.
3.1. Create a PyPI account.
We need an account in PyPi so we can interact with it as a package publisher. This step is quite straight forward, just go to the official registration page and sign up for an account.
3.2. Enabling token authentication
Token authentication is the recommended way to use your PyPI account in the command line. You can use a single, automatically generated token instead of a username and password. Tokens can be added and revoked at any time or granted granular access to parts of your account. This makes them more secure, and avoids the risk of your password being compromised.
Once you're logged in,
- Browse to your account settings
- In the section API tokens click on the
Add API tokenbutton - Give a name to your token. I use the name of the machine where I intend to apply this token, so I have a token per publisher and I can quickly revoke any. I'll put here
endor. - Be sure that you select the scope that fits for you. In my case I want that the token is allowed to interact with the whole account.
- Click on the button
Add token. Your new token will appear in the screen. Remember that the token is only displayed once, so you better note it down or copy it somewhere else otherwise you'll need to create a new one!
Now that we have a token, let's apply it to our computer to allow it to publish packages to PyPI.
In your terminal, add the token to the Poetry configuration. Replace your-api-token with the token you received above!
poetry config pypi-token.pypi your-api-tokenPython will notify you that it will store your credentials in plain text. This would be an issue if you were using a traditional username and password for your credentials. Given that tokens can be easily deleted and renewed, while also being randomly generated and unique to a single use case, this makes token storage here a safe trade off for convenience
Now you have your environment ready to build and publish your package!
4. Build the project
Now it's time to generate the package itself. As I mentioned above, I assume that you have a Python/Poetry project up and running, ready to be distributed. Move yourself to the directory containing the project in a terminal and type:
poetry buildThis will trigger the built of the project and present an output similar to the following:
Building pyxavi (0.3.3)
  - Building sdist
  - Built pyxavi-0.3.3.tar.gz
  - Building wheel
  - Built pyxavi-0.3.3-py3-none-any.whl
Two files will be outputted. First is the source which is sdist, that outputs to a tar.gz file. Second is the compiled package, which is wheel, that outputs to a .whl file.
5. Publish the package
With the project built, we are ready to publish the package. Still in the directory of your project, where you built the package, type:
poetry publishThis will upload and publish the package into the account you created above:
Publishing pyxavi (0.3.3) to PyPI
 - Uploading pyxavi-0.3.3.tar.gz 100%
 - Uploading pyxavi-0.3.3-py3-none-any.whl 100%
And that's it, we can go to our project's section in PyPI and see that we have our library published there.
6. Use the published package
So now that we have our library as a package published in PyPI, we can create a new application that use it. I am sure that you already have a fancy Python application but just in case, remember that we can quickly create a new Poetry manager Python app with the following:
-
In a terminal window, go to the directory where you have your projects, for example:
cd ~/repositories -
Create a new directory for a new app, and navigate to it
mkdir myapp cd myapp -
Initialize a new Poetry managed Python app
poetry initAs we already know, this will ask you some questions like name, version and dependencies. It's in this dependencies one where we can place the package we just distributed:
$ poetry init

This command will guide you through creating your pyproject.toml config.

Package name [myapp]:  myapp
Version [0.1.0]:
Description []:
Author [Xavi <***@***.***>, n to skip]:
License []:
Compatible Python versions [^3.10]:

Would you like to define your main dependencies interactively? (yes/no) [yes]
You can specify a package in the following forms:
  - A single name (requests): this will search for matches on PyPI
  - A name and a constraint (requests@^2.23.0)
  - A git url (git+https://github.com/python-poetry/poetry.git)
  - A git url with a revision (git+https://github.com/python-poetry/poetry.git#develop)
  - A file path (../my-package/my-package.whl)
  - A directory (../my-package/)
  - A url (https://example.com/packages/my-package-0.1.0.tar.gz)

Package to add or search for (leave blank to skip): pyxavi@^0.3.3
Adding pyxavi@^0.3.3

Add a package (leave blank to skip):

Would you like to define your development dependencies interactively? (yes/no) [yes] n
Generated file

[tool.poetry]
name = "myapp"
version = "0.1.0"
description = ""
authors = ["Xavi <xavi@arnaus.net>"]
readme = "README.md"

[tool.poetry.dependencies]
python = "^3.10"
pyxavi = "^0.3.3"

[build-system]
requires = ["poetry-core"]
build-backend = "poetry.core.masonry.api"

Do you confirm generation? (yes/no) [yes]
And now we are able to start working in our new Python project. Of course, if you just want to add it into your existing project, just edit your pyproject.toml and add your library as a dependency inside the block [tool.poetry.dependencies] as shown above. Just remember that you have an extensive version syntax that you can follow, explained in the Poetry's official documentation's Dependency specification.
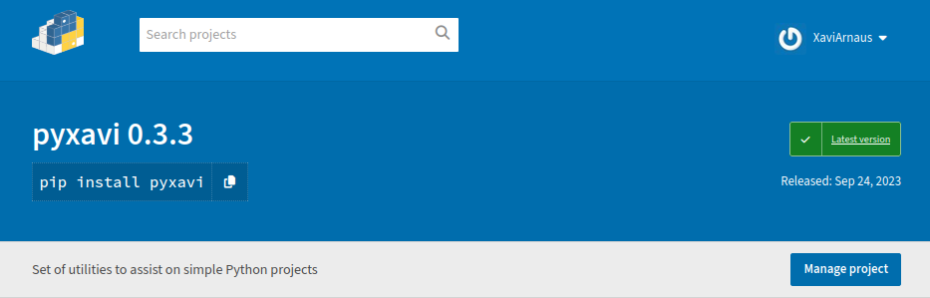
7. Formatting the project's PyPI page
Now allow me to write some words regarding the page of your project in PyPI. If you visit the PyPI's webpage for my pyxavi package you will notice that there is a bit more than the README. There are sections for Project links, classifiers, ... All of this is set up in the pyproject.toml file.
For example, here is mine, as you can see in my repository:
[tool.poetry]
name = "pyxavi"
version = "0.3.3"
description = "Set of utilities to assist on simple Python projects"
authors = ["Xavier Arnaus <xavi@arnaus.net>"]
readme = "README.md"
license = "GPLv3"
repository = "https://github.com/XaviArnaus/pyxavi"
homepage = "https://github.com/XaviArnaus/pyxavi"
include = [
    "LICENSE",
    "CHANGELOG.md"
]
classifiers = [
    "Programming Language :: Python :: 3",
    "License :: OSI Approved :: GNU General Public License v3 (GPLv3)",
    "Operating System :: OS Independent",
]

...
As usual, don't forget to read the official documentation for these parameters for Python packaging and also the Poetry packaging. Still, let me describe the ones I use here above:
name: The name of the project, as it is going to be seenversion: The version of the projectdescription: A description of what this project is aboutauthors: A list of mail & name of the authors of this projectreadme: The name of the file where PyPI will get the content from, and publish it as the main content for the page. Be sure it is markdown.license: The license that this project is under. It is a string, seems like it is not parsed. Poetry recommends to choose one of these.repository: The URL to where the code of the project is published. A GitHub repository works, as well as other repositories. It's just a link.homepage: The URL to the homepage of the project, if any. At the moment of writing, I have this pointing to the GitHub repository as well.include: A list of files that will be included in the package when building and publishing it, but it does not appear in the PyPI's package homepage.classifiers: This is a list of free text strings that the official documentation call "trove classifiers". We can find a list of possible classifiers to define here.
6. Wrapping up
So turned out that it is quite simple to build and publish our library as a package, ready to be used by anyone in Python projects.