
Lately I am getting good at cooking a typical “truita de patates” how we call it in Catalunya, “tortilla de patatas” how they call it in Spain, or “Spanish omelette” how I discovered it is called internationally. I took a family receipt, some tips and tricks around, and evolved my own receipt that brings a delicious omelette with potatoes and onions as a base.
In a recent team breakfast I promised to some of my peers that I'll share my receipt, so here it goes 😋
Overview
This is a receipt for the Spanish omelette. I split it in the following sections:
- Disclaimer and Assumptions
- Ingredients
- Cutting and preparing
- Cooking
- The resting phase
- The final fry
- Wrapping up
Disclaimer and Assumptions
Please understand that a tortilla is kind of a representation of whoever cooks it. With the eggs more done or more raw, with or without onion, more toasted outside or not. My father use to add chorizo. My girlfriend and me like to add garlic. I sometimes add also a bit of red paprika in dices with the onions… So please allow me to explain here my tortilla de patatas base and from here you can make your own.
I assume that you have a kitchen with enough space for messing up, a stove, one hour and a half aprox, and also:
- Pan of ~24cm of diameter, deep if possible, as we want to cook, not to fry.
- A wooden spoon to stir everything up
- A cutting wood and good sharp knife.
- A potato cutter just makes life easier
- A big strainer
- A mid-size bowl to mix the ingredients.
Ingredients
- 500g of potatoes (in Germany we have 3 types. Choose “festkochend” or strong. They should not fall apart when fried).
- 1 big (~5cm diameter) onion, or better 3 small (~3cm diameter) ones.
- Optionally 3 garlic teeth.
- Also optionally half a red Anaheim pepper or one Piquillo pepper
- Quite a lot of olive oil 0.4 (not really pure, will taste too strong otherwise). It should make a 1cm deep pool in the pan. Could work with other oil (sunflower?) but taste will get affected.
- 5 eggs size L. The best is to use Organic ones, the ones which code start with
0

1. Cutting and preparing
We start by cutting everything, so later it’s only about to bringing ingredients together. The potatoes should be cut longitudinally two times, so you get like 4 sticks, and then in thin slices. This is to allow the potato to be cooked homogeneously.


The onions should be cut vertically once and then in half rings. In Spain we call it corte juliana. This will make the onion to help mix the whole mass together.

If you add garlic, it should be cut in very small cubes, the idea is to be mixed easily with the rest of the ingredients but still be able to notice a shot when getting one in the mouth.

If you add red pepper, it should be cut in small-ish cubes as well. I like them small, like 0.5cm2, so they mix well with the rest of ingredients.
Now that everything is cut, put the pan in the stove at half power and add the oil. Let it warm with a cap.

While the oil is warming up, let’s put the cut potatoes, onions and the optional red pepper into the bowl and use the hands to effectively split all portions a part. When we cut the potatoes and the onions they tend to stay together and need this extra effort to have a well separated and homogeneous mix.


Remember to keep the optional garlic a part for now.
2. Cooking
This is the most boring but also the most delicate part. Once the oil is warm (not boiling) we add the content of the bowl. Stir it up (little darling) so that everything gets wet, and close the cab of the pan again.
At my place this phase takes around 35 minutes. I keep close the cab all the time as I want it cooked, and just open every 10 / 15 minutes to stir everything up.
When is it done? Hard to say, and also depends on the taste. I like it cooked (as opposite of kinda raw), so I usually see that the onions became loose in the first stir, the whole mix becomes more golden-ish in the second stir, and finally some of the potatoes and onions start to get well done when it’s time to take it out.


A trick to guess if its time to take it out from the stove is by pressing a potato with the spoon. If it softly brakes apart then it’s time to leave. Under my taste, the onions are the most delicate, as if they are raw you have this chewing texture like in a salad, that has to be avoided here.

3. The resting phase
This phase is the hidden trick that made for me the change to start doing good tortillas.
After the second stir it’s time to prepare the eggs. Just break and empty them into the bowl. Beat slightly the eggs so the yolk and the white part gets mixed, but you don’t need to over do too much.


Prepare a deep plate in the sink so that we collect the oil and put the strainer on top. When we decide that the pan is cooked enough, take it out from the stove and empty the content in the strainer, so that we dry the mass from the oil, that gets collected in the dish.

Now empty the strainer into the bowl where the beaten eggs are and stir it up so everything gets mixed. You will see that adding the warm mass into the eggs is actually starting to cook the eggs, appearing white areas. This is good because pre-cooks everything and therefore the tortilla has a less cooking difference between the outside and the inside.

Keep the mass and the eggs together for a couple of minutes.
Meanwhile, bring just a little of the collected oil back to the pan and warm it up. If we want to add garlic, this is the moment that we add it into the pan with the warm oil and fry it golden. Be sure not to burn it, it goes fast! When starts to be dark yellow retire the garlic (you’ll be surprised how fast it goes burned from here) but keep the oil in the pan.

Add the garlic to the bowl and stir it up one more time.


4. The final fry
Now it’s time to bring the mixed mass to the pan. Once it touches the pan it will start frying so be fast on extending it homogeneously in the pan. Be sure that you still have the stove at half level and control it down if necessary. We want to do a final fry, but we don’t want to have the outside toasted and the inner raw. Frying slow is always a good bet.

Here it also depends a lot on everyone’s taste. The longer you fry it now the more done will end up. In my case I control that the center looses the liquid appearance while controlling the outside not getting burn. There is this critic moment when the inner needs just a bit more and the outside is already done, that we proceed to turn the tortilla around.

To turn it around just place a dish over the pan and turn it over in one shot, quite fast. With experience you will learn not to throw oil all over and then you’ll master not to do a real mess 😉 Now slide the tortilla from the dish to the pan again and let it fry a little more.
You can tap the tortilla with the wooden spoon. There will be a moment that you feel it hard, cooked, below the outside golden skin, and this will be the moment to take it out from the stove and from the pan.

To take it out from the pan slide a flat wooden spoon between the tortilla and the pan, to help it leave the pan without breaking it.
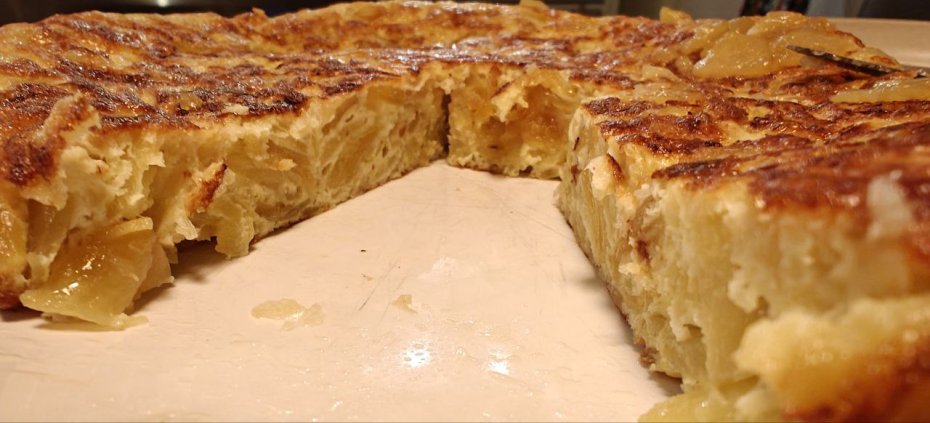
5. Wrapping up
And here we have our great tortilla de patatas. A great way to accompany it the catalan way is to serve it with pa amb tomàquet. Open half a baguette in two, scratch one or two tomatoes over the bread, pour a line of oil and maybe a pinch of salt, bring the 2 sides back together and now cut the bread in slices.

I hope you enjoy it, and remember: the more you practice the better you'll become!